Initializing the Workspace
Defining the Workspace Parameters
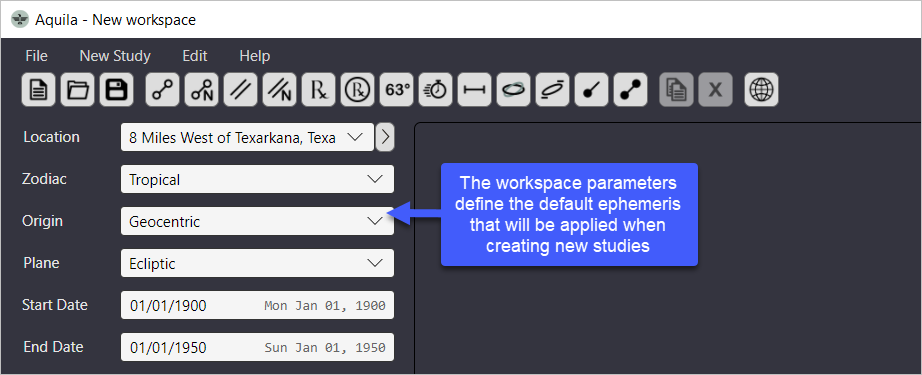
Each workspace features a set of parameters that establish the default ephemeris to be used when creating new studies. These parameters help streamline the process by minimizing repetitive data entry. Here's what you need to know:
- Location: All coordinate systems need the time zone. For topocentric ephemerides, you also need the longitude, latitude, and height above sea level.
- Zodiac System: Choose either Tropical or Sidereal.
- Coordinate System Origin: Select from Geocentric, Topocentric, or Heliocentric.
- Reference Plane: Options are Ecliptic or Equatorial.
- Start Date: This begins at midnight. For example, if Jan 7, 2021, is chosen, it starts at 12:00 am on that date.
- End Date: This stops at midnight, so no events on the end date, or beyond, will be included in the results.
The ehemeris settings for each study can be edited. However, setting these default values thoughtfully makes creating new studies more efficient.
 Defining the workspace parameters
In the above image, parameters have been defined for a tropical, geocentric, ecliptic ephemeris starting on Jan 1, 1900 and ending on Jan 1, 1950.
Saving the Workspace
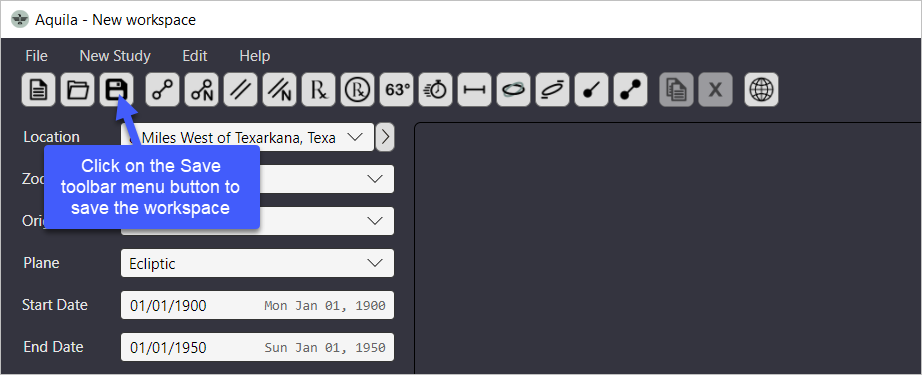
You can save the workspace, along with any studies it contains, in three ways:
- Click the 'Save' button on the toolbar.
- Go to the main menu and select 'File' followed by 'Save.'
- Use the keyboard shortcut 'Ctrl+S' by holding down the 'CTRL' key and tapping the 'S' key."
These methods will ensure that your workspace and its contents are saved.
 Saving the workspace
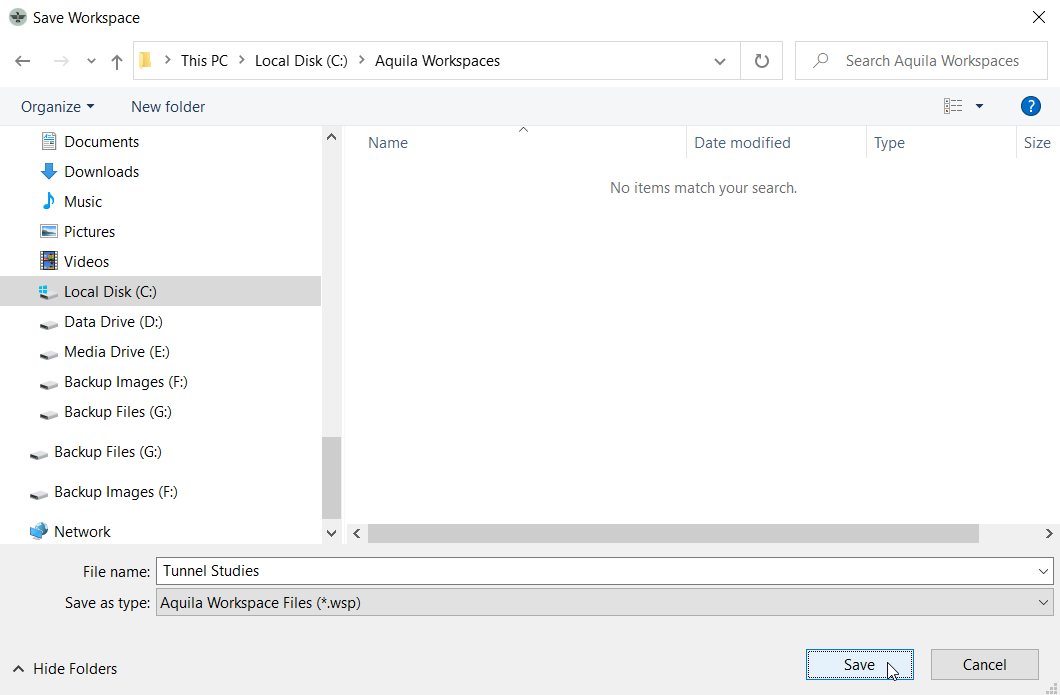
A dialog window will appear since this is the first time you're saving the workspace. Simply follow these steps:
- Browse to the folder where you want to save the workspace.
- Enter 'Tunnel Studies' as the file or workspace name.
- Click the 'Save' button."
These actions will save the workspace in the desired location with the specified name.
 Selecting the folder location and entering a name for the workspace
Notice that the workspace name now appears in the title bar of the Aquila application window.
 The workspace name appears in the window title bar